Content Service
The content service is responsible for content related to education in the LifeOmic API. It powers the LifeOmic Platform Programs feature, which allows you to build an interactive learning program for subjects. This educational program is delivered with the LifeOmic mobile app. Content service offers course creation related functions, such as putting content in a draft or published state.
You can also attach media assets to a course. This involves the two types of content service data, content and file. Content data is structured JSON describing an educational component, such as a course or course day. File data is the actual file related to the content, such as mp3, png, or pdf files.
Content service is intended for educational content. It does not encrypt files and is not HIPAA compliant. Use the files service if you need HIPAA compliance and encrypted file handling.
Getting Started with the Content Service API
This guide walks you through using the content service for these basic operations:
For content service endpoint details, see the API Reference Information. For authentication and other basic operations with the LifeOmic API, see Getting Started.
List Content
Use GET https://api.us.lifeomic.com/v1/content/{projectId}/content to list all the content for your LifeOmic project. This command uses the projectId parameter to specify the project. To find the <project-id>, see Find the Project ID.
List Content Call Example
This cURL example uses the projectId parameter to specify the project:
curl --location 'https://api.us.lifeomic.com/v1/content/<projectId>/content' \
--header 'LifeOmic-Account: <account-id>' \
--header 'Accept: application/json' \
--header 'Authorization: Bearer <api-key>'
Response to List Content Call
The content call returns a JSON response that lists the education items and includes a content ID, display name, type, status, and other fields for each item. The Programs feature in the LifeOmic Platform relies on these fields for the user interface presentation. In the below screenshot, you can see the Courses category contains a course titled Get Eating Healthy. This information is derived from the type and displayName items contained in the list content response. These lines are highlighted in the response example below the screenshot.
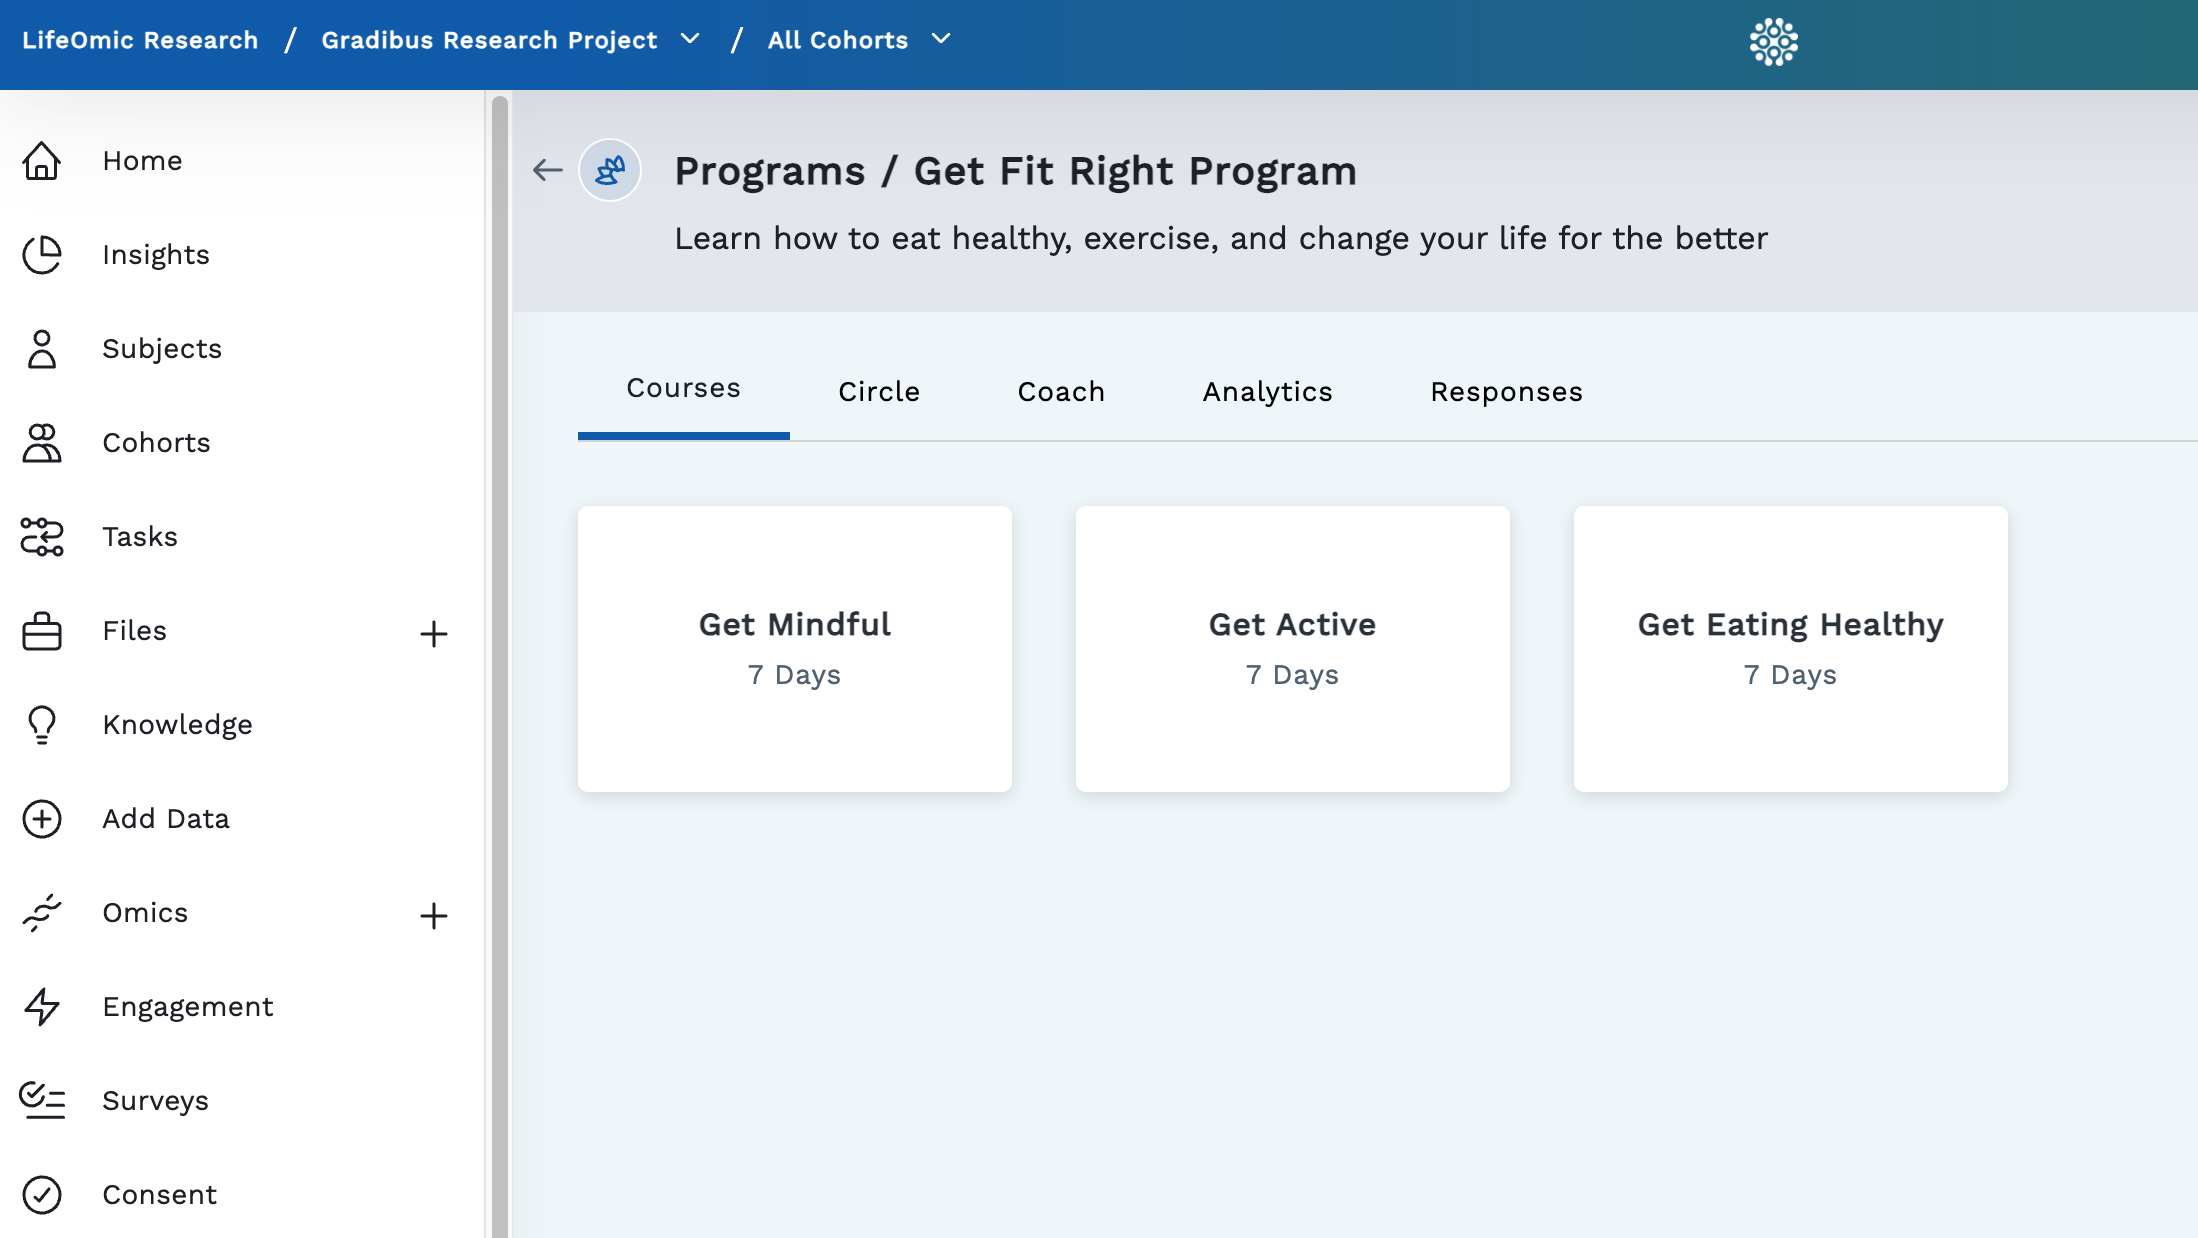
Response to List Content Call Example with nextPageToken
This response highlights the displayName and type values.
{
    "items": [
        {
            "id": "f968d237-73c6-46cf-814e-5f040b7af494",
            "project": "<projectId>",
            "displayName": "Get Eating Healthy",
            "type": "course",
            "fields": {
                "description": {
                    "value": "learning about meditation"
                },
                "duration": {
                    "value": 7
                },
                "daySlugs": {
                    "value": [
                        "390fdc3d-3078-43dd-9387-48caa4978b1e",
                        "0660c507-b1a4-4e71-827f-984189d9acc6",
                        "2dda07cc-908e-4fb1-a862-fb51b8354e1a",
                        "bff73e02-257d-4b37-97fe-b96fbe9103b2",
                        "c5532546-aa23-4b8b-b2c9-85ab60826f19",
                        "37bab494-b226-4248-8651-f5a58a930091",
                        "c3e98713-b2d7-4fb7-9fc0-c1f1e6ec23ff"
                    ]
                },
                "isPristine": {
                    "value": false
                }
            },
            "slug": "1defb12c-daae-42f2-b13c-b9d010ef8c45",
            "keyPath": "meditation-program-99823e2d-5cef-4990-af00-f92cafc8fd07/1defb12c-daae-42f2-b13c-b9d010ef8c45",
            "status": "draft",
            "isDirty": true,
            "lastModified": "2022-10-12T19:45:43.795Z",
            "account": "<account-id>"
        },
    ],
    "links": {
        "self": "/v1/content/<projectId>/content",
        "next": "/v1/content/<projectId>/content?nextPageToken=eyJwcm9qZWN0IjoiZWJlMTYxOGYtZTQ3NC00OTQ3LWE2ZDItMThiMTlmYWM2NjNhIiwiaWQiOiJsaWZlb21pYzowNjAwYzNmNC02YTM5LTQ2NjktOGU1MC0zZjMxNDU5NWEzMmQiLCJyb3dUeXBlIjoiY29udGVudDpsaWZlb21pYzowNjAwYzNmNC02YTM5LTQ2NjktOGU1MC0zZjMxNDU5NWEzMmQiLCJ0eXBlIjoicHJvZ3JhbSJ9"
    }
}
Large Numbers of Content Items
A project can have too many content items to be listed in a simple response. If more items exist than can be contained in the response, a nextPageToken appears in the last line of the response, as highlighted in the JSON example above.
If you receive a nextPageToken in your response, you use the same techniques that are used in the Parameters to Help Manage a Large Number of Files to work with a large number of content items.
List a Specific Content Item
To show a specific content item, you make another Get Content call. This time you add the id from your earlier response.
Example of List a Specific Content Item Call
curl --location 'https://api.us.lifeomic.com/v1/content/<projectId>/content/<contentId>' \
--header 'LifeOmic-Account: <account-id>' \
--header 'Accept: application/json' \
--header 'Authorization: Bearer <api-key>'
Response to List a Specific Content Item Call
In addition to the information contained in the response from the general list call, the response to the specific list call contains fileAttachments and contentAttachments keys. A file attachment creates the relationship between content and supporting files. It also optimizes browser rendering and provides checks for accidental deletion. Content attachments perform a similar role to file attachments, but they reference content slugs instead of file IDs.
This response highlights the fileAttachments and contentAttachments values.
{
    "id": "<contentId>",
    "project": "<projectId>",
    "displayName": "Get Mindful",
    "type": "course",
    "fields": {
        "description": {
            "value": "Learn about meditation"
        },
        "duration": {
            "value": 7
        },
        "daySlugs": {
            "value": [
                "fce28b1f-4d69-488f-903a-433ea6e805dc",
                "15fc6713-c3bb-481b-8154-4a46d2903223",
                "7cf9c432-ef92-4c5b-ab12-438cf0d23b92",
                "8caa081c-ba70-4174-9657-19e693b041e0",
                "fa7fff5c-ba70-4fe4-8a6f-9304fea75621",
                "0cf4e478-c3a5-494c-bf4b-bfa28bfbc19c",
                "b06820c9-dbf1-4965-a240-2b8b0d02397e"
            ]
        },
        "isPristine": {
            "value": false
        }
    },
    "slug": "get-mindful-a30fecda-fe23-4101-98f8-89a367d9c752",
    "keyPath": "meditation-program-99823e2d-5cef-4990-af00-f92cafc8fd07/get-mindful-a30fecda-fe23-4101-98f8-89a367d9c752",
    "status": "draft",
    "isDirty": true,
    "lastModified": "2023-03-06T22:55:00.062Z",
    "account": "lifeomic",
    "fileAttachments": [],
    "contentAttachments": [
        {
            "project": "ebe1618f-e474-4947-a6d2-18b19fac663a",
            "parentId": "692470f5-42cc-467f-b05c-ba33da51c5c7",
            "childSlug": "0cf4e478-c3a5-494c-bf4b-bfa28bfbc19c",
            "parentType": "course",
            "childType": "courseDay",
            "meta": {}
        },
        {
            "project": "ebe1618f-e474-4947-a6d2-18b19fac663a",
            "parentId": "692470f5-42cc-467f-b05c-ba33da51c5c7",
            "childSlug": "15fc6713-c3bb-481b-8154-4a46d2903223",
            "parentType": "course",
            "childType": "courseDay",
            "meta": {}
        }
    ]
}
Delete Content
To delete content, you make a DELETE call and include the contentId. This is the 32-digit id value in the first line of each item entry in the GET content response. A successful deletion returns a 204 (No Content) response with an empty response body.
Published content may not be directly deleted, it must be unpublished first. To unpublish, see Publish Content.
Example of Delete Content Call
curl --location --request DELETE 'https://api.us.lifeomic.com/v1/content/<projectId>/content/<contentId>' \
--header 'LifeOmic-Account: <account-id>' \
--header 'Accept: application/json' \
--header 'Authorization: Bearer <api-key>'
Create a Course
Creating a course requires four major operations. The first is to create the content item. A content item is designated by the contentId. You can think of this as the name and concept of the course, such as might appear as an entry in a college catalog. The second operation is to create the files that make up the course material, such as audio, graphic, text, or video files. A file is designated by the fileId. When we have created both items, the third operation is to attach the files to the content. Then we have a course made up of a contentId with fileAttachments of fileIds. Our last step is to publish this course and move it out of the initial draft state.
Create Content
Make a POST https://api.us.lifeomic.com/v1/content/{{projectId}}/content call to create a content item. If an id is not supplied by the user, a unique id is assigned with the response. This id is the contentId you need for future operations.
The POST call requires body data in the JSON format. This table details the minimum data keys required to create a content item.
| Key | Value | Mandatory |
|---|---|---|
| id | contentId | Optional |
| project | projectId | Required |
| displayName | course-name | Required |
| type | education-component-type | Required |
| slug | developer-supplied-slug | Required |
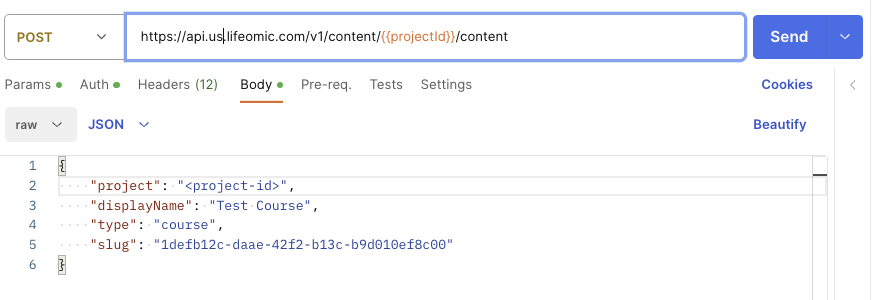
For Postman, click the Body tab and select the raw option and JSON. Paste the JSON key and value string in the text box.
Example of Create Content Call
curl --location 'https://api.us.lifeomic.com/v1/content/<projectId>/content' \
--header 'LifeOmic-Account: <account-id>' \
--header 'Accept: application/json' \
--header 'Authorization: <api-key>' \
--header 'Content-Type: application/json' \
--data '{
    "project": "<projectId>",
    "displayName": "<course-name>",
    "type": "course",
    "slug": "<developer-supplied-slug>"
}'
Response to Create Content Call
The response to the POST call contains the id key that contains the ContentId value. It also adds fields for file and content attachments.
{
    "id": "8256efc4-116f-4063-bd6b-6d63b4ad8b56",
    "project": "<projectId>",
    "displayName": "Test Course",
    "type": "course",
    "slug": "1defb12c-daae-42f2-b13c-b9d010ef8c00",
    "status": "draft",
    "isDirty": true,
    "lastModified": "2023-06-20T14:57:52.066Z",
    "account": "<account-name>",
    "fileAttachments": [],
    "contentAttachments": []
}
Upload a File
After you obtain a contentId with the POST content call, you upload a file. Uploading files is a two call operation. The first call is a POST call for a response that contains a postform URL. The second call is a POST call to upload the file to the postform URL.
These operations are described below and also contained in the Bash Script for File Operations.
POST Call to Create a File
Make a POST https://api.us.lifeomic.com/v1/content/{{projectId}}/file call to create a new file in the content service. The POST call requires body data in the JSON format. If a file ID is not supplied by the user, a unique file ID is assigned with the response.
For Postman, click the Body tab and select the raw option and JSON. Paste the JSON key and value string in the text box.
| Key | Value | Mandatory |
|---|---|---|
| name | file-name | Required |
| project | project-id | Required |
| contentType | media-type | Optional |
| id | file-id | Optional |
Example of Create a File POST Call
This example shows the JSON string after the data signifier for the body.
curl --location 'https://api.us.lifeomic.com/v1/content/<projectId>/file' \
--header 'LifeOmic-Account: <account-id>' \
--header 'Accept: application/json' \
--header 'Authorization: Bearer <api-key>' \
--header 'Content-Type: application/json' \
--data '{"project":"<project-id>","name":"test5.png"}'
Response to Create a File POST Call
The response to the POST call contains the fileId as id. The Amazon S3 URL is after the postForm key.
{
    "id": "<fileId>",
    "name": "test.json",
    "contentType": "application/json",
    "userId": "lifeomic-user@company.com",
    "meta": {
        "isDirectory": false,
        "private": false
    },
    "postForm": {
        "url": "https://<s3-url>",
        "fields": {
            "ContentType": "application/json",
            "bucket": "<amazon-bucket>",
            "X-Amz-Algorithm": "<amz-algorithm>",
            "X-Amz-Credential": "<amz-credential>",
            "X-Amz-Date": "20230621T133333Z",
            "X-Amz-Security-Token": "<token-value>",
            "key": "<account>/<project-id>/<file-id>/test.json",
            "Policy": "<policy-value>",
            "X-Amz-Signature": "<signature-value>"
        }
    }
}
POST Call to Upload File Content
Make the POST call that uploads the file data against the postForm url from the first POST response. The required Amazon authentication parameters are also contained in the response. You need to include the Amazon authentication parameters as form data in the body of the request. You also need to include the path to the file to be uploaded in the body request.
The postForm url expires in sixty seconds. To create the POST call within this time period, you may need to use the Bash Script for File Operations.
Example of Upload a File POST Call
The cURL example shows the path to upload the file.
curl --location 'https://<s3-url>' \
--form 'ContentType="image/png"' \
--form 'bucket="<s3-bucket-name>"' \
--form 'X-Amz-Algorithm="AWS4-HMAC-SHA256"' \
--form 'X-Amz-Credential="<amz-credential>"' \
--form 'X-Amz-Date="20230622T151420Z"' \
--form 'X-Amz-Security-Token="<amz-security-token>"' \
--form 'key="<file-key>"' \
--form 'Policy="<policy-id>"' \
--form 'X-Amz-Signature="<amz-signature>"' \
--form 'file=@"/Users/johnsmith/Desktop/test5.png"'
Response to a Upload a File POST Call
A successful upload results in a 200 (OK) response message. You can also confirm the file is stored in the LifeOmic Platform with a GET Content File call.
Example of GET Content File Call
The GET content file call response contains the fileId.
curl --location 'https://api.us.lifeomic.com/v1/content/<projectId>/file' \
--header 'LifeOmic-Account: <account-id>' \
--header 'Accept: application/json' \
--header 'Authorization: Bearer <api-key>'
Attach a File to Content
After creating content and creating and uploading a file, you attach the file to the course. Attach a file to a course with the PUT https://api.us.lifeomic.com/v1/content/{{projectId}}/content/{{contentId}}/file-attachment/{{fileId}} call.
You will need the contentId from the content you created and the fileId from the file you uploaded. Use these two GET calls to find that information:
https://api.us.lifeomic.com/v1/content/{{projectId}}/contenthttps://api.us.lifeomic.com/v1/content/{{projectId}}/file
Example of Attach a File to Content PUT Call
curl --location --request PUT ''https://api.us.lifeomic.com/v1/content/<projectId>/content/<contentId>/file-attachment/<fileId>' \
--header 'LifeOmic-Account: <account-id>' \
--header 'Accept: application/json' \
--header 'Authorization: <api-key>'
Response to Attach a File to Content PUT Call
A successful attachment results in a 201 (Created) response message. You can also make a GET https://api.us.lifeomic.com/v1/content/<projectId>/content/<contentId> call and confirm the file is listed under fileAttachments in the response.
Access Public Content
Files put into content service are publicly accessible, by default. Files are accessible at: https://content.<env>.lifeomic.com/<account>/<projectId>/<fileId>/key/to/file.
You can find the file URL paired with the url key under fileAttachments in the response to a GET https://api.us.lifeomic.com/v1/content/<projectId>/content/<contentId> call.
Publish Content
Content is created with a default status of draft. You promote content from draft state to publish state with the POST https://api.us.lifeomic.com/v1/content/{{projectId}}/content/{{contentId}}/publish call.
You can demote from the publish state to the draft state with the
POST https://api.us.lifeomic.com/v1/content/{{projectId}}/content/{{contentId}}/draft call.
You can find the current status of content in the response to a GET https://api.us.lifeomic.com/v1/content/{{projectId}}/content call.
Example of Publish Content Post Call
This cURL example uses the path parameter publish.
curl --location --request POST 'https://api.us.lifeomic.com/v1/content/<projectId>/content/<contentId>/publish' \
--header 'LifeOmic-Account: <account-id>' \
--header 'Accept: application/json' \
--header 'Authorization: <api-key>'
Response to Publish Content Post Call
The response shows the status change to published.
{
    "id": "contentId",
    "project": "projectId",
    "displayName": "Test Course",
    "type": "course",
    "fields": {
        "description": {
            "value": "Test course description"
        }
    },
    "slug": "1defb12c-daae-42f2-b13c-b9d010ef8c99",
    "status": "published",
    "isDirty": false,
    "version": 1687448761669,
    "lastModified": "2023-06-20T14:29:54.662Z",
    "publishDate": "2023-06-22T15:46:01.669Z",
    "account": "account-name"
}
Further Information
You have completed the basic operations for the content service. For additional information, see the Content Service section of the API Reference Information. You can see the service used with the LifeOmic Platform UI in the Programs feature. You can also Contact LifeOmic for more information on advanced operations.
Bash Script for File Operations
This script makes the POST call to Create a File, POST call to Upload File Content, and a GET call to display the files in the project.
#!/bin/bash

IP=$(curl --location 'https://api.us.lifeomic.com/v1/content/<project-id>/file' \
  --header 'LifeOmic-Account: lifeomic' \
  --header 'Accept: application/json' \
  --header 'Authorization: Bearer <api-key>' \
  --header 'Content-Type: application/json' \
  --data '{"project":"<project-id>","name":"<filename.format>","contentType":"<content-type/format>","displayName": "<filename.format>"}')

# assign the value ContentType to a variable and print it
ContentType=$(echo $IP | jq -r '.postForm.fields.ContentType')
bucket=$(echo $IP | jq -r '.postForm.fields.bucket')
X_Amz_Algorithm=$(echo $IP | jq -r '.postForm.fields."X-Amz-Algorithm"')
X_Amz_Credential=$(echo $IP | jq -r '.postForm.fields."X-Amz-Credential"')
X_Amz_Date=$(echo $IP | jq -r '.postForm.fields."X-Amz-Date"')
X_Amz_Security_Token=$(echo $IP | jq -r '.postForm.fields."X-Amz-Security-Token"')
key=$(echo $IP | jq -r '.postForm.fields.key')
Policy=$(echo $IP | jq -r '.postForm.fields.Policy')
X_Amz_Signature=$(echo $IP | jq -r '.postForm.fields."X-Amz-Signature"')

IP=$(curl --location 'https://s3.us-east-1.amazonaws.com/lifeomic-us-content-service-files' \
  --form 'ContentType="'$ContentType'"' \
  --form 'bucket="'$bucket'"' \
  --form 'X-Amz-Algorithm="'$X_Amz_Algorithm'"' \
  --form 'X-Amz-Credential="'$X_Amz_Credential'"' \
  --form 'X-Amz-Date="'$X_Amz_Date'"' \
  --form 'X-Amz-Security-Token="'$X_Amz_Security_Token'"' \
  --form 'key="'$key'"' \
  --form 'Policy="'$Policy'"' \
  --form 'X-Amz-Signature="'$X_Amz_Signature'"' \
  --form 'file=@"/home/jeffbeard/Desktop/test6.png"')

IP=$(curl --location 'https://api.us.lifeomic.com/v1/content/<project-id>/file' \
  --header 'LifeOmic-Account: <account-name>' \
  --header 'Accept: application/json' \
  --header 'Authorization: Bearer <api-key>' \
  --header 'Content-Type: application/json')

echo $IP | jq .